Post-Installation Setup Guide to view steps for installation please visit this link.
After you have installed the package from AppSource, please refer to these steps to set up and configure your Blitzz Integration within Dynamics 365.
1. Package Activation with Blitzz API Key
To configure the package, you will need the Blitzz API key for your account. If you don’t have your API Key, please contact us at support@blitzz.co.
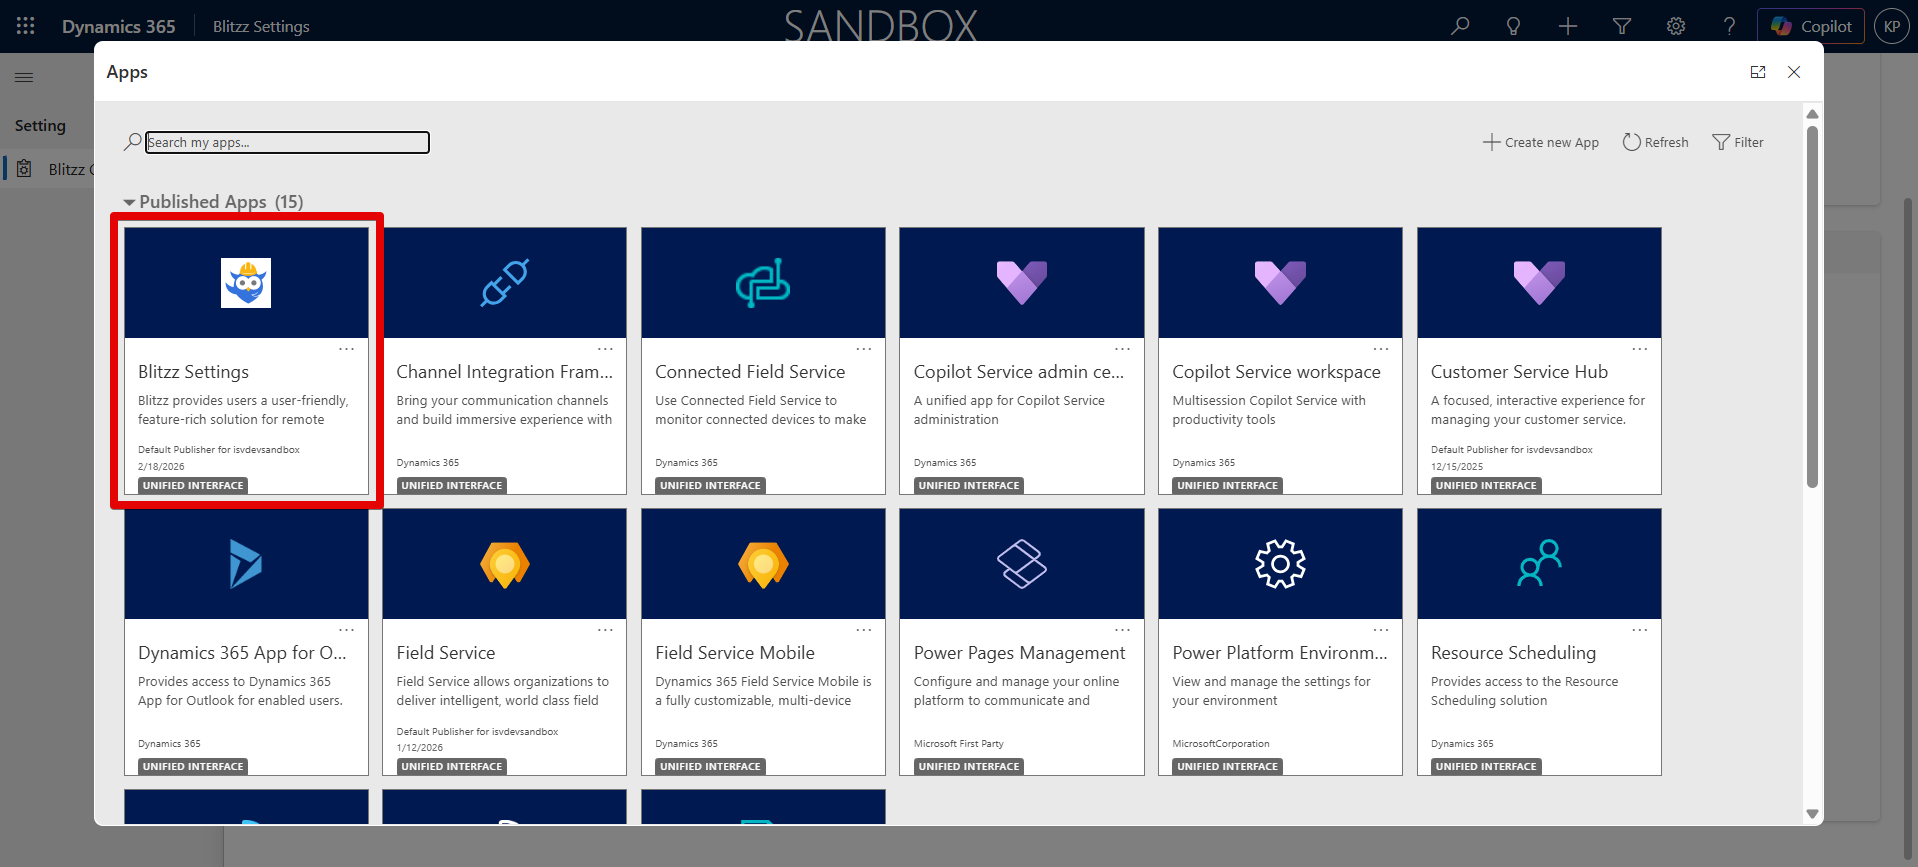
- In Dynamics 365, click the App Selector from the top-left corner of the navigation bar.
- Select the Blitzz Settings app from the list.
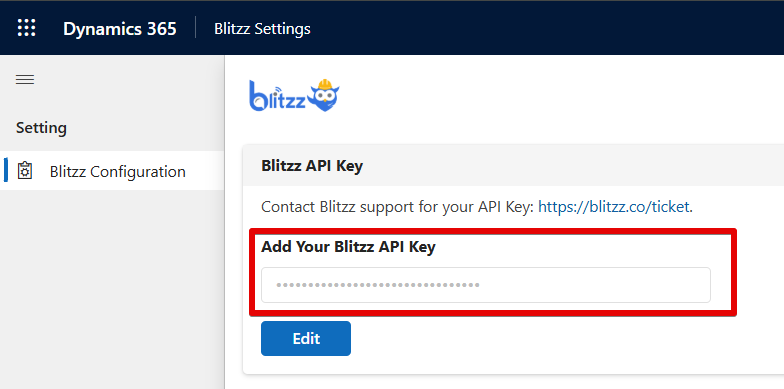
- In the Blitzz Settings app, locate the “API Key” section (shown as Blitzz Configuration in the left nav).
- Click Edit, then enter your Blitzz API Key in the “Add Your Blitzz API Key” field.
- Click Save.
2. Video Call Widget Configuration (Field Mapping)
The Blitzz Video Support control needs to know which entity fields to pull reference IDs, phone numbers, and email addresses from. You must create a field mapping for each entity where you plan to use the video control.
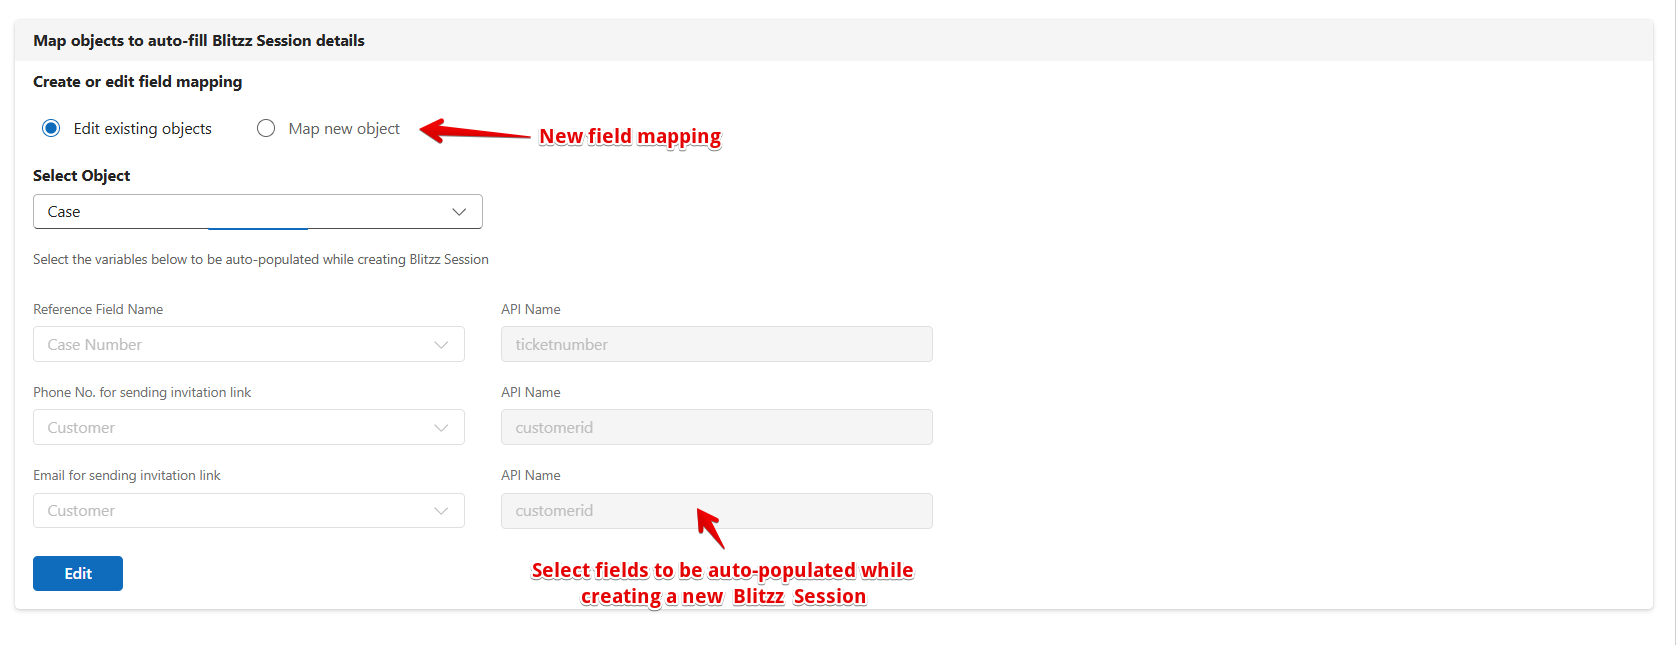
- In the Blitzz Settings app, navigate to the Field Mapping section.
- Select “Map new object” (radio button) and choose your entity from the Select Object dropdown (e.g., Case, Work Order).
- Configure the following fields. Phone Number and Email are optional — if these fields do not exist directly on the entity, you may map them from a related Contact or Customer lookup:
- Reference Field Name — A unique identifier to associate a Blitzz session with this record (e.g., Case Number). Required.
- Phone No. for sending invitation link — The phone number auto-populated when sending an SMS invite. Maps to a phone field on the entity or related Customer. Optional.
- Email for sending invitation link — The email address auto-populated when sending an email invite. Maps to an email field on the entity or related Customer. Optional.
- Click Edit, then Create and Save.
Note: Blitzz fetches mobile number and/or email from the Customer object automatically. Repeat this mapping for each entity where you intend to use the Blitzz widget (e.g., create separate mappings for Case and Work Order).
3. Adding the Blitzz Video Support Widget to a Form
The following steps show how to add the Blitzz PCF control to the Case Main form. Repeat for any other entity form where you want the widget to appear (e.g., Work Order). You will need to create a placeholder column on the table first to anchor the PCF control.
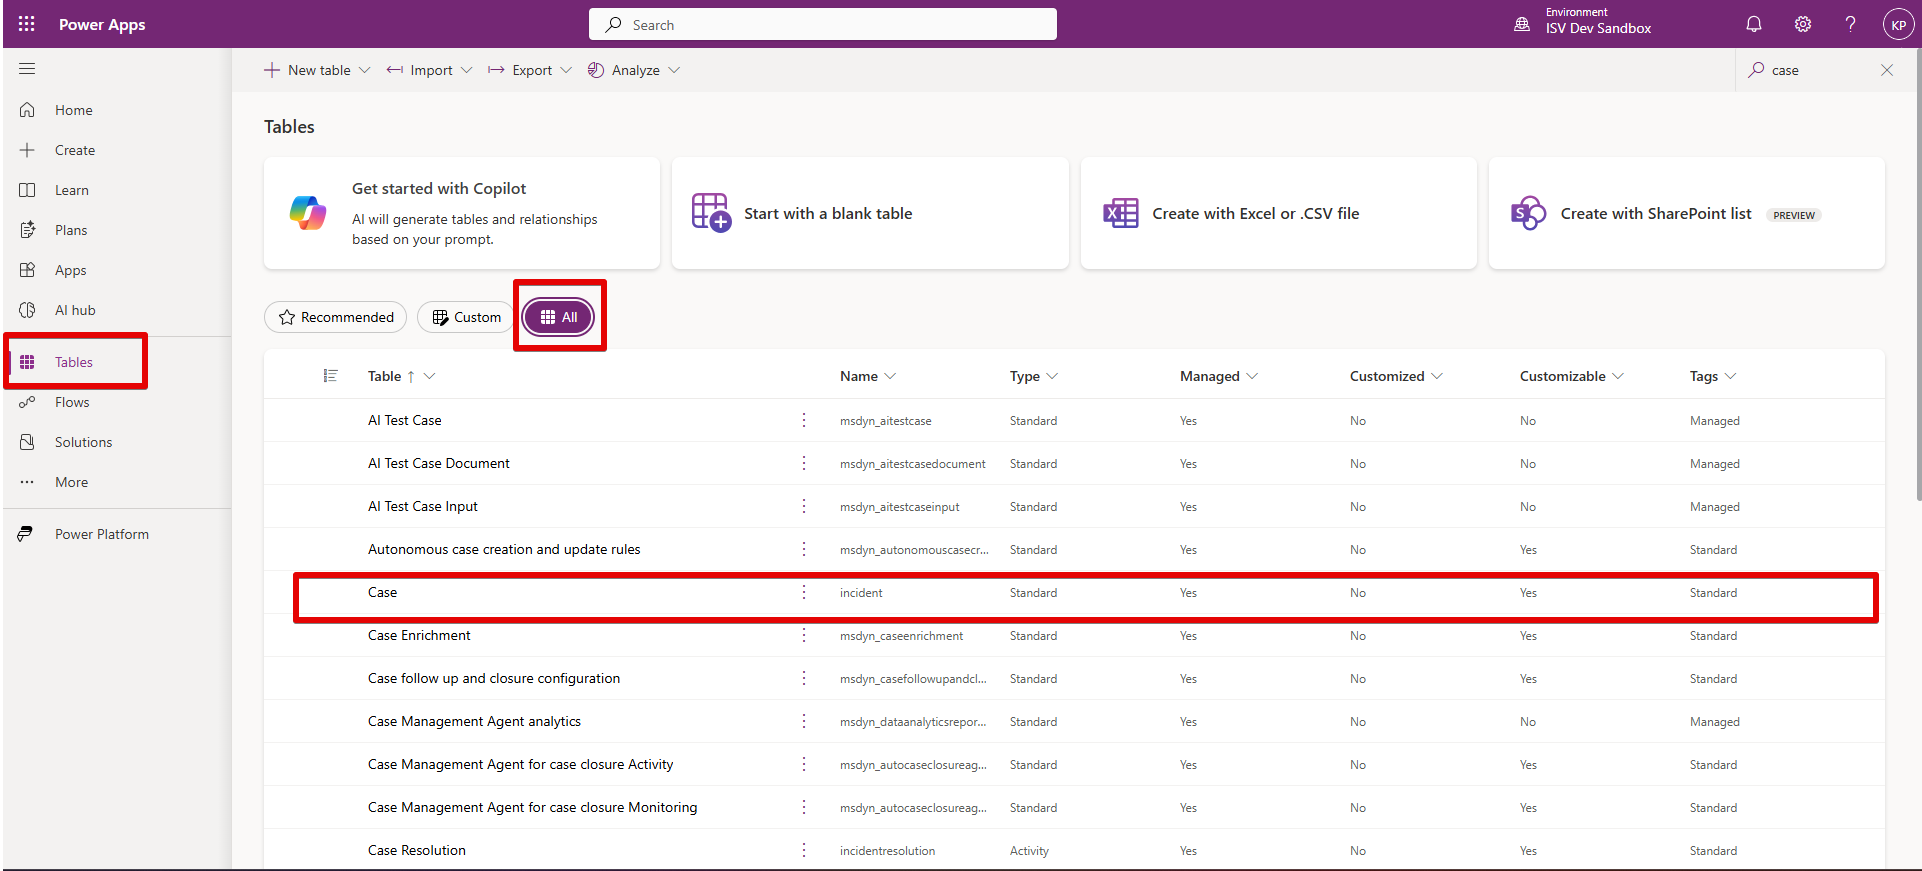
- Navigate to make.powerapps.com and select your environment from the top-right environment selector.
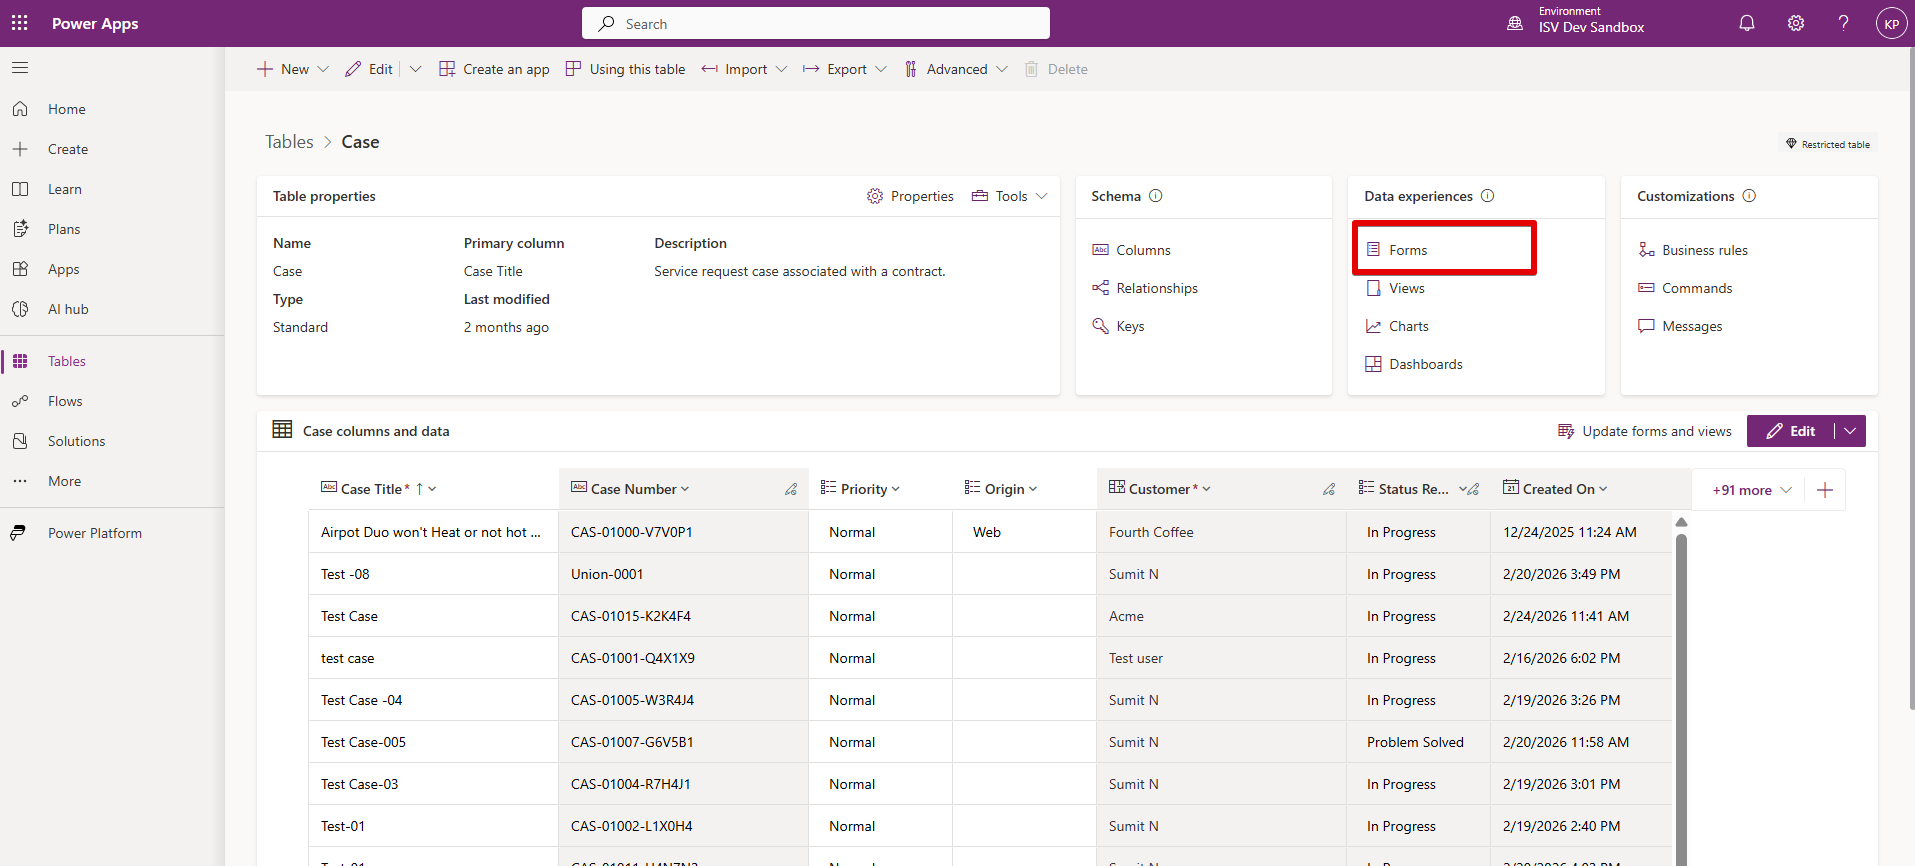
- In the left navigation, click Tables, then click All to show all tables. Search for and click Case (logical name: incident).
- On the Case table page, under the Data experiences section, click Forms.
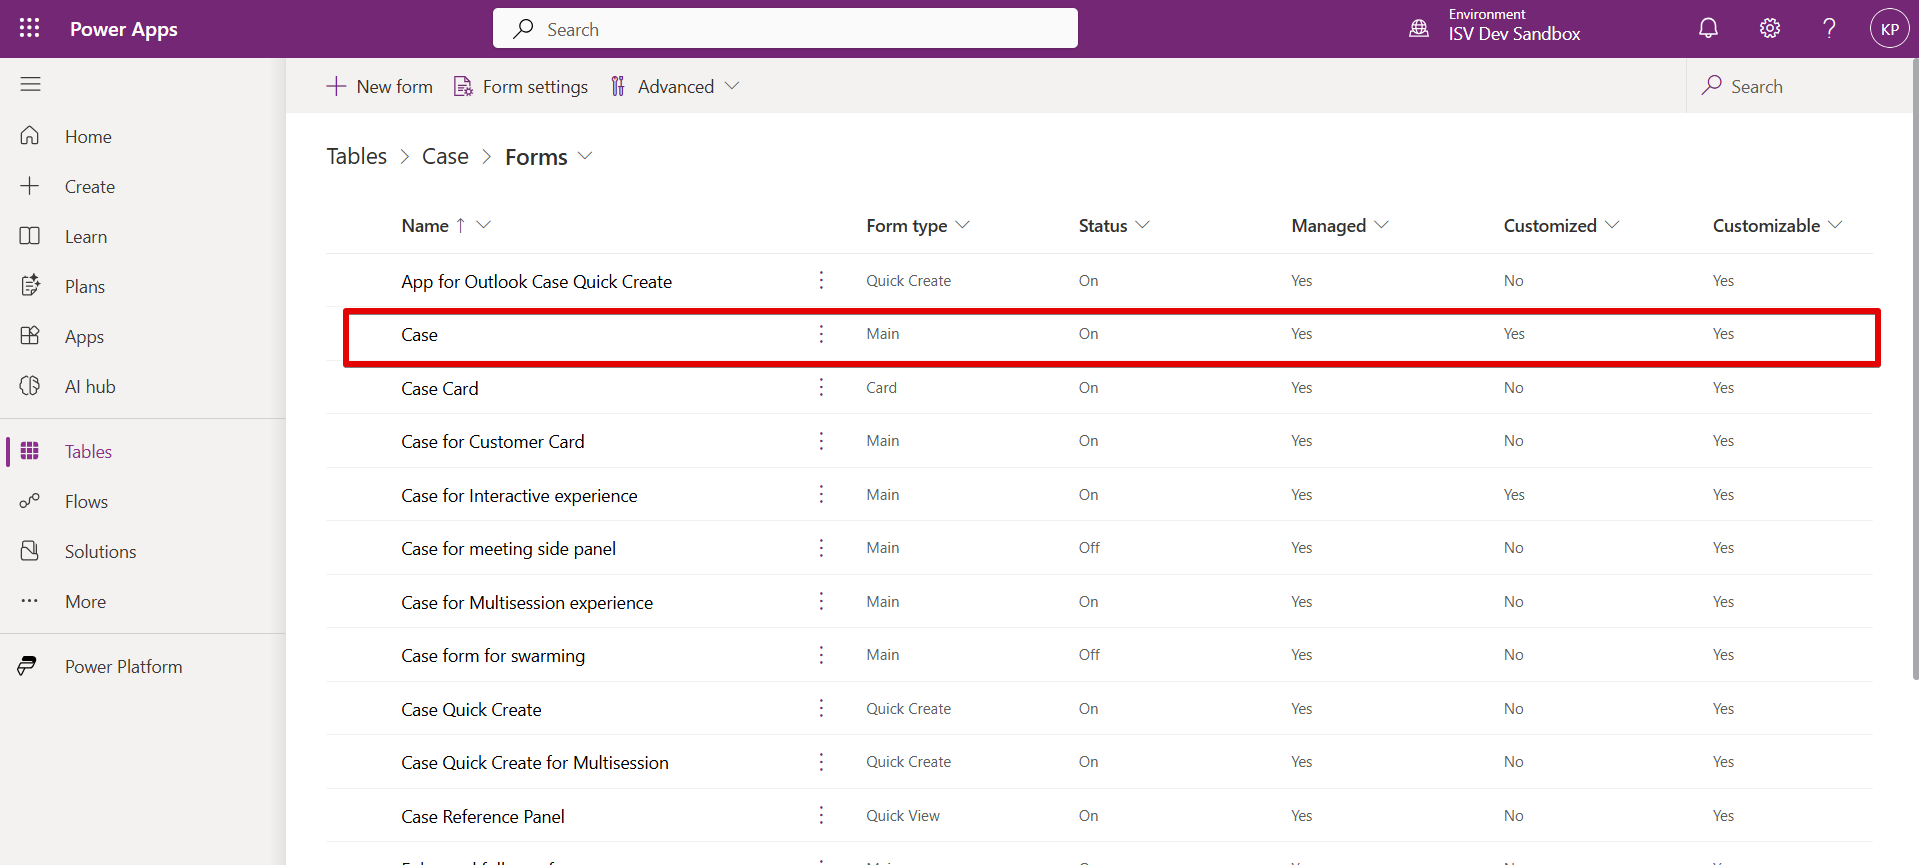
- From the Forms list, click the Case form with Form type Main. This is the primary form agents will see. Do not edit Quick Create or Quick View forms.
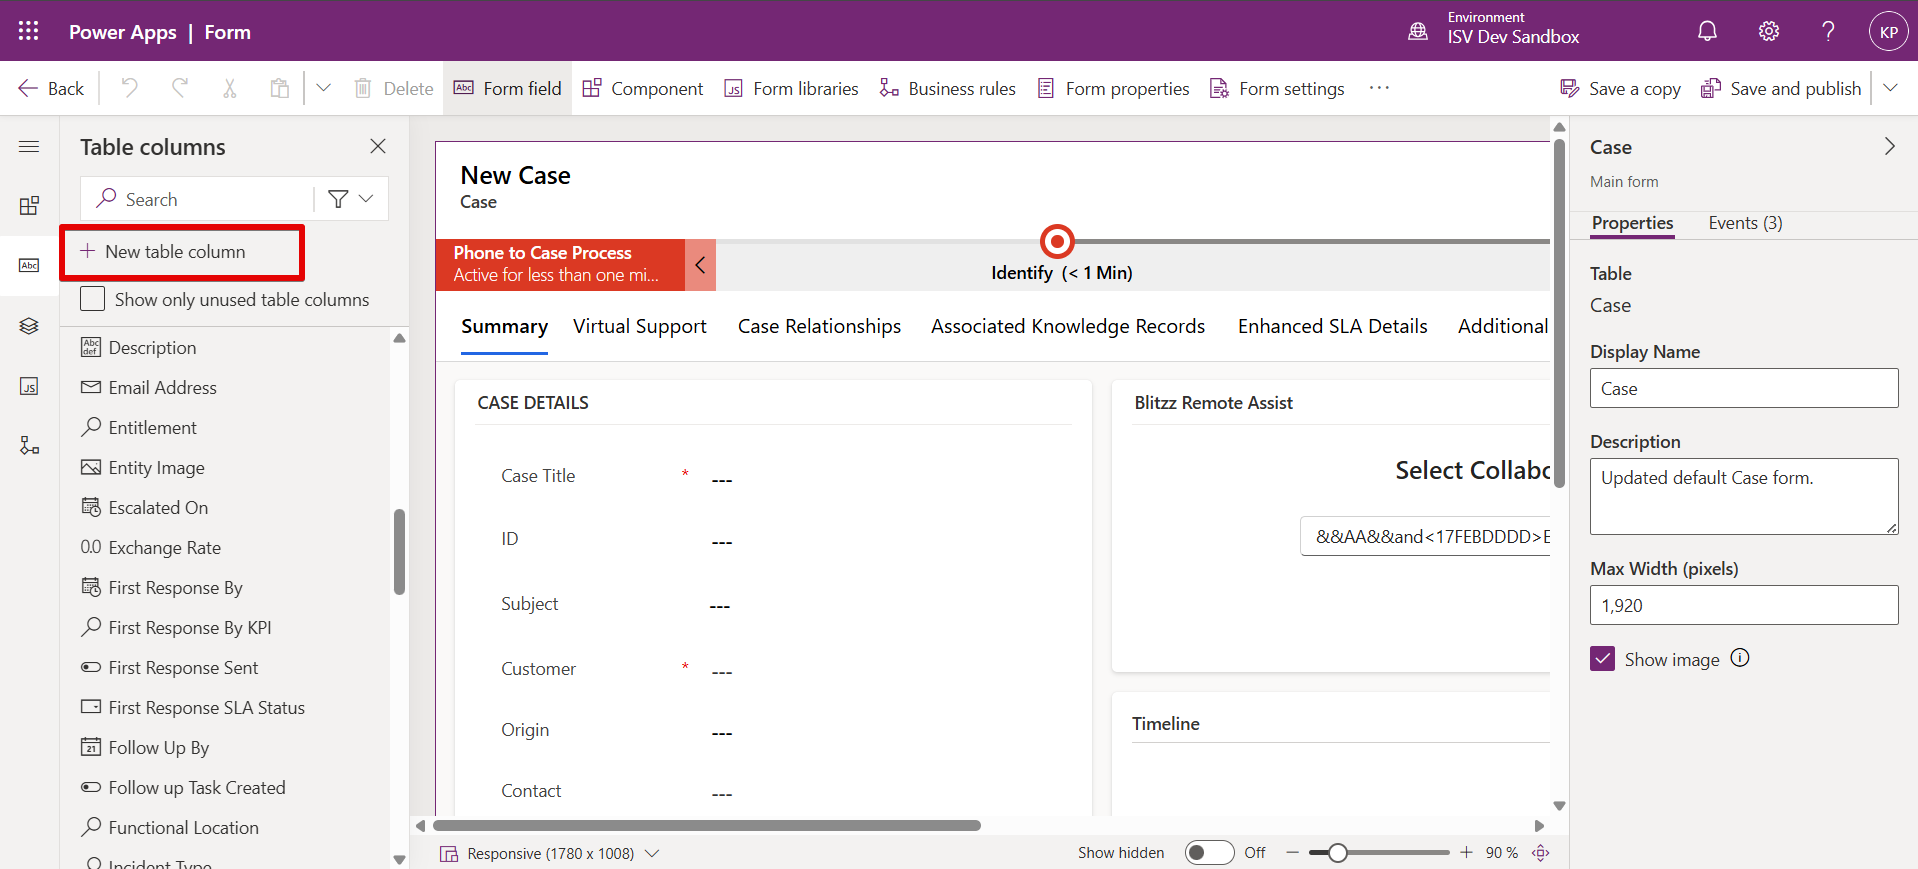
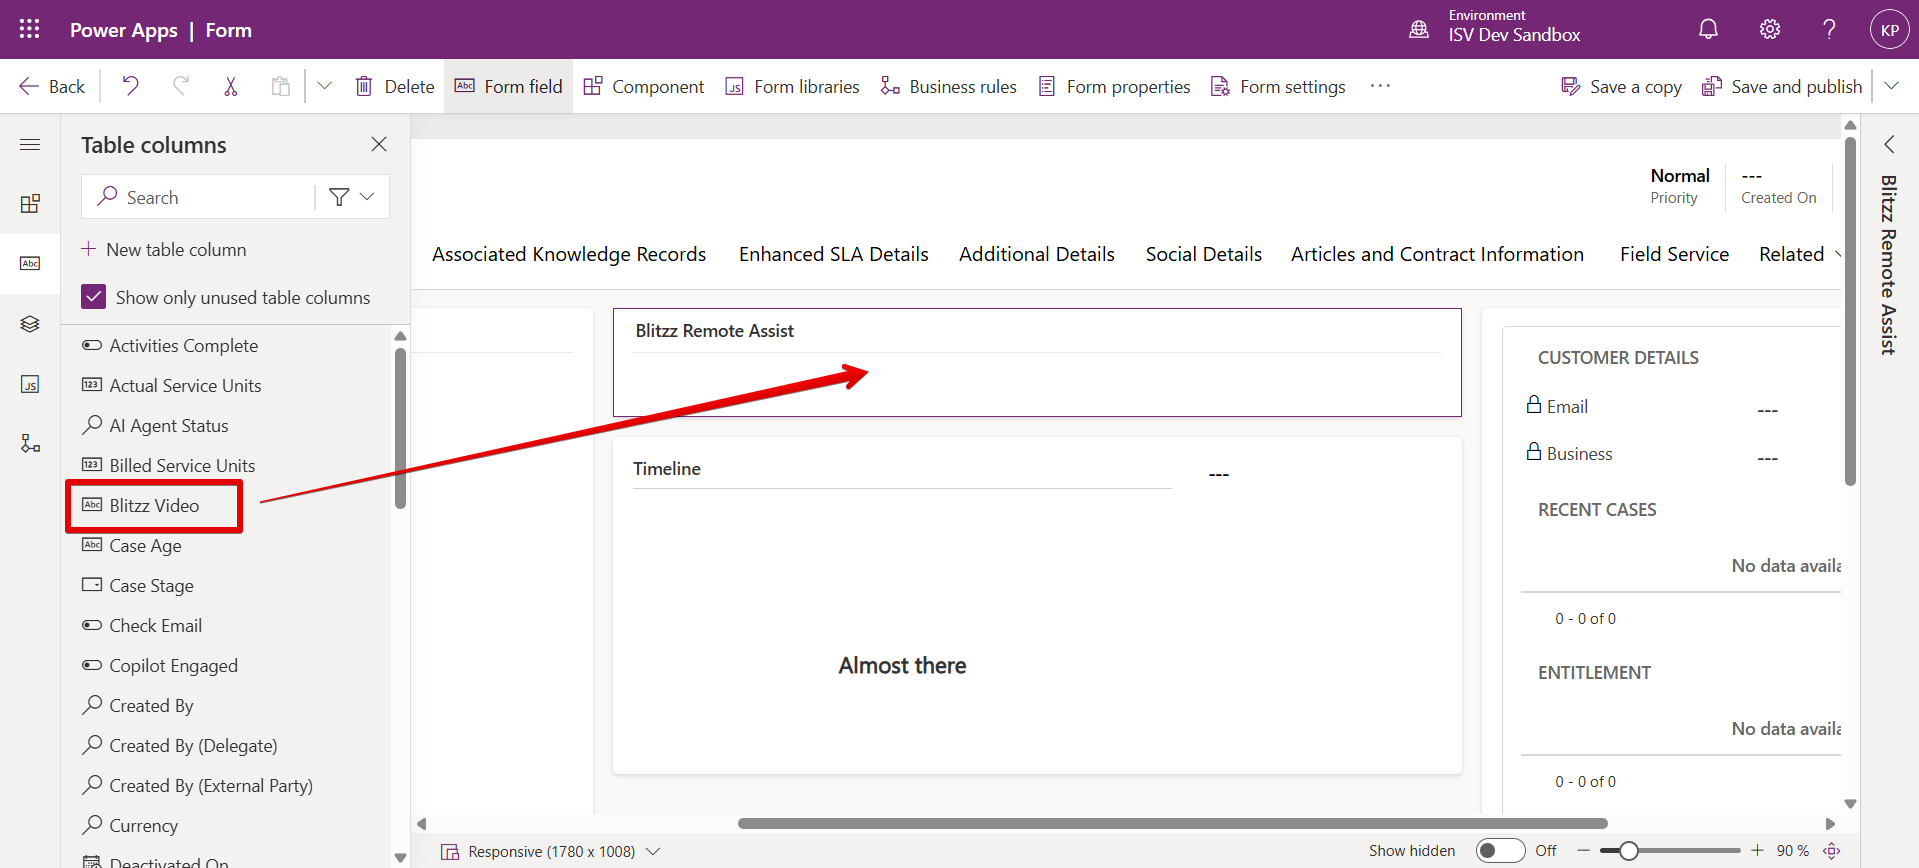
- The Form Designer opens. In the Table columns panel on the left, click + New table column to create a placeholder column to anchor the Blitzz PCF control.
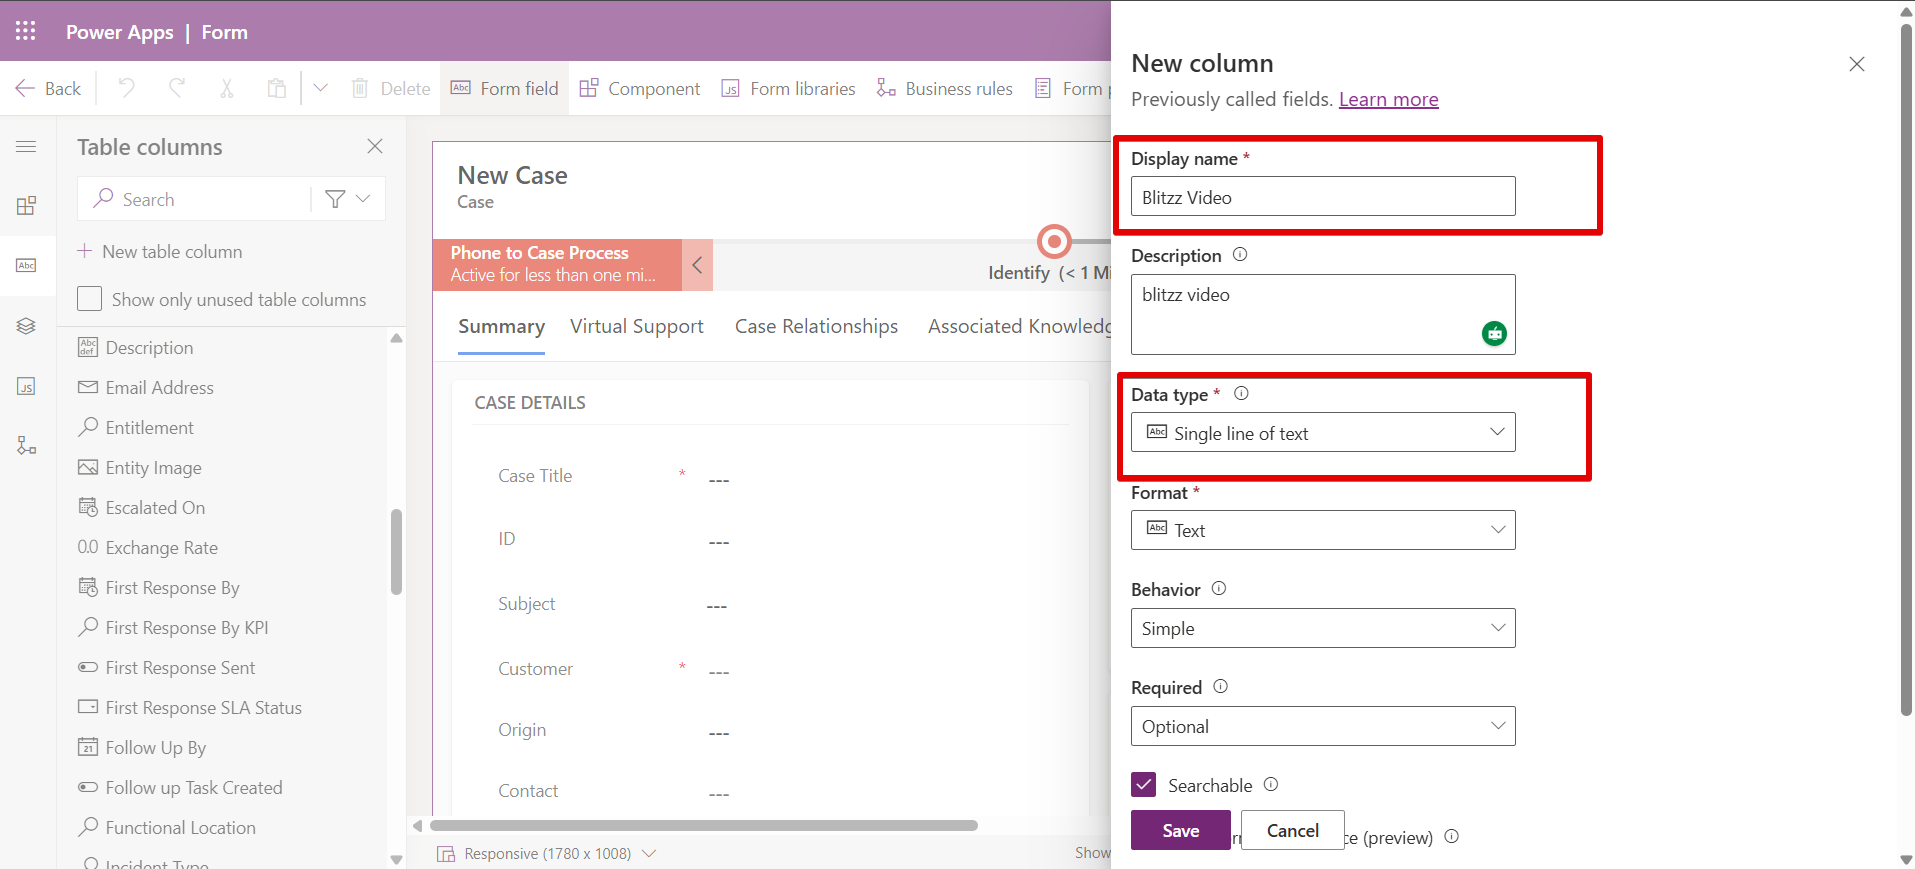
- In the New column panel that appears on the right, set Display name to "Blitzz Video", set Data type to Single line of text, and click Save. This field is used as an anchor only and will not be visible to end users.
Note: Please do not select any other Data type.
- Back in the Form Designer, locate the new Blitzz Video column in the left panel. Drag it onto the Blitzz Remote Assist section on the form canvas (or any section where you want the widget to appear).
- With the Blitzz Video field selected on the canvas, click + Component in the right-hand Properties panel. In the Add component flyout, search for and select BlitzzVideoSupport. Check the Hide label checkbox so only the widget renders, not the field label.
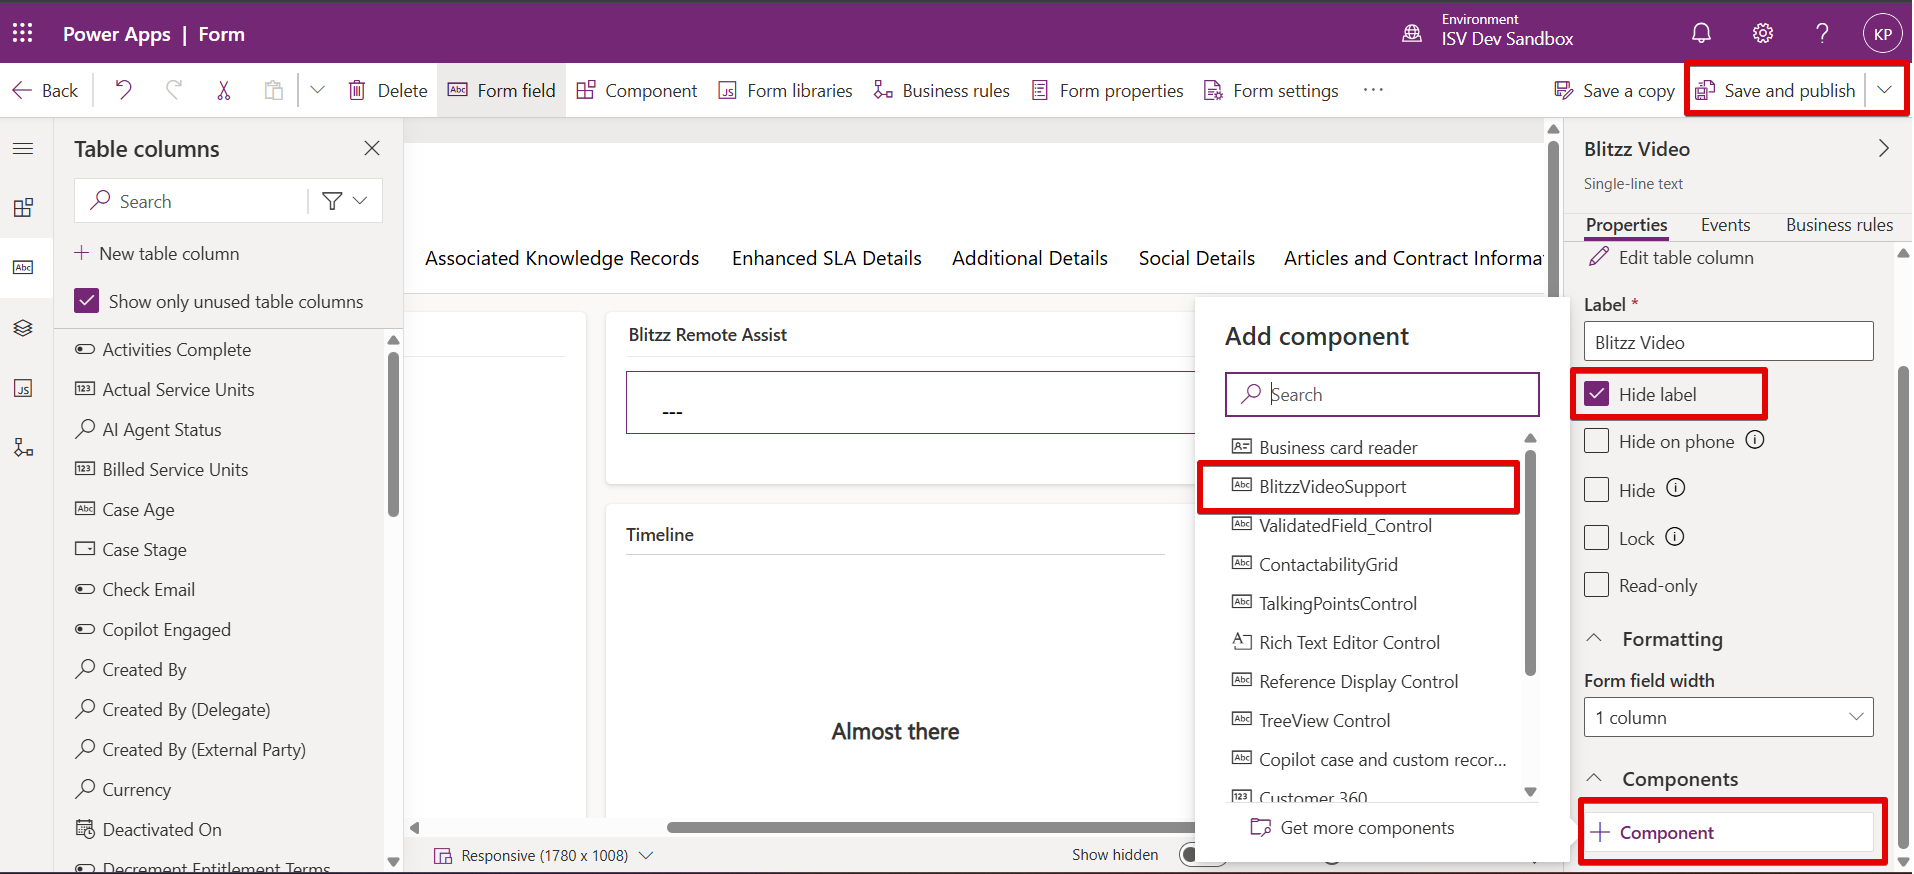
- Click Save and publish in the top-right corner. The Blitzz widget will not appear for users until the form is published.
Note: After publishing, navigate to a Case record in Dynamics 365 Customer Service to confirm the Blitzz widget appears correctly. If it does not appear, verify that the form you edited is the active form assigned to your users’ security roles.